Integrate VKontakte channel
Function Introduction
After integrating VKontakte into WildGoose customer service, customers' inquiries in VKontakte can be viewed and replied in real-time in the WildGoose customer service backend. Enable enterprises to manage and operate VKontakte in real-time on the same platform, achieving centralized operation of communication with multi-channel customers on the same platform. At the same time, WildGoose customer service also provides AI robots, automatic translation, quick replies, statistical analysis and other functions, which can help you improve marketing conversion rates, repurchase rates, customer satisfaction and reduce service costs.
Access steps
1. Enter the VKontakte integration page
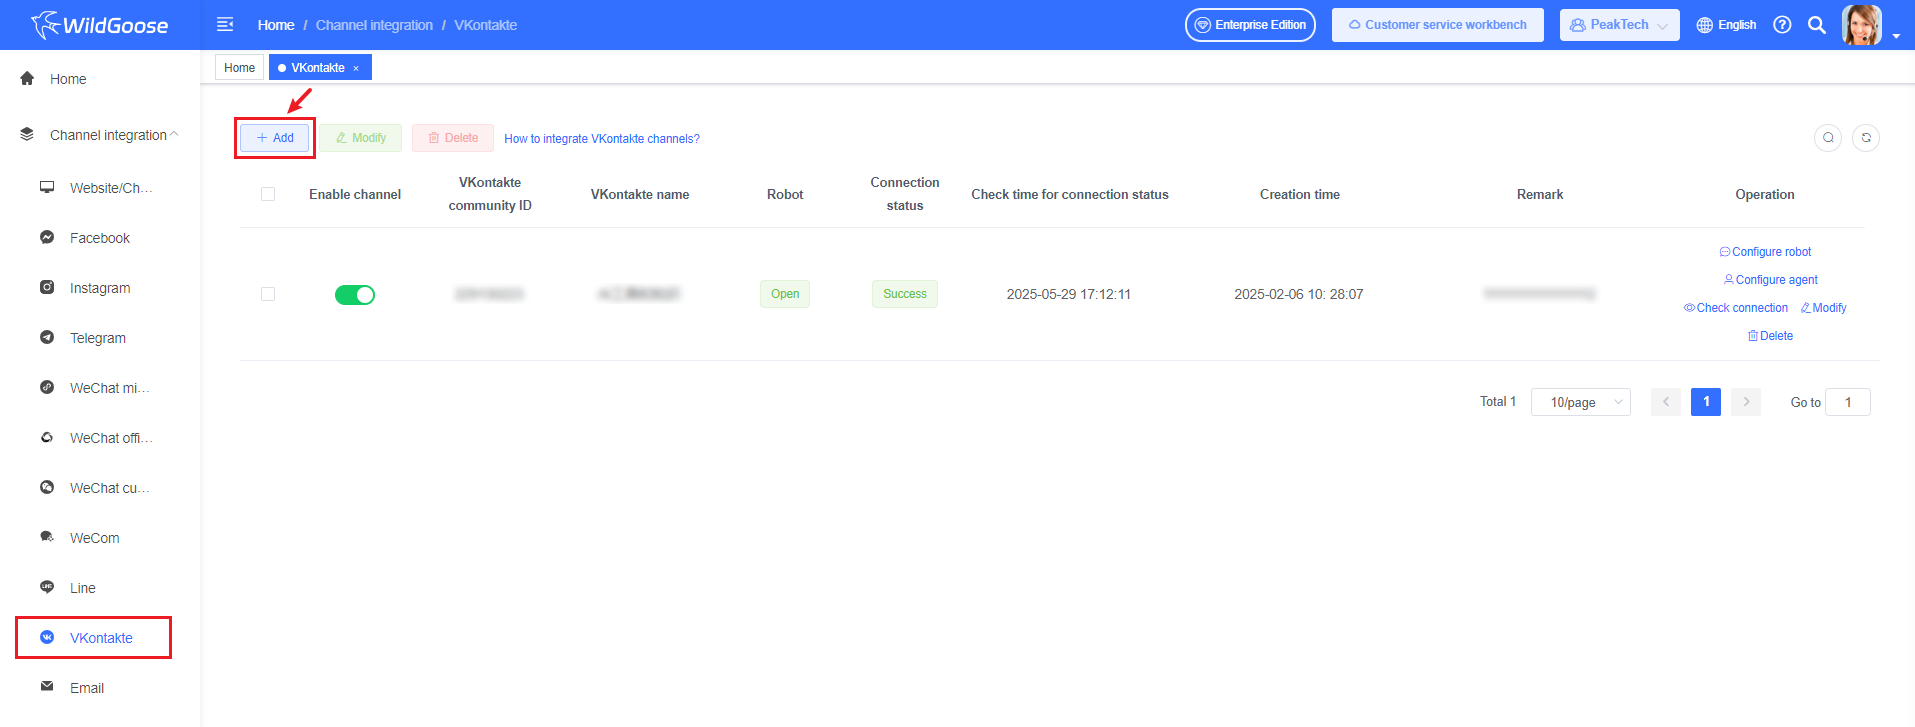
Log in to the WildGoose customer service Management Workbench, click the [Add] button in the [Channel integration] - [VKontakte] menu.
2. Integrate VKontakte community
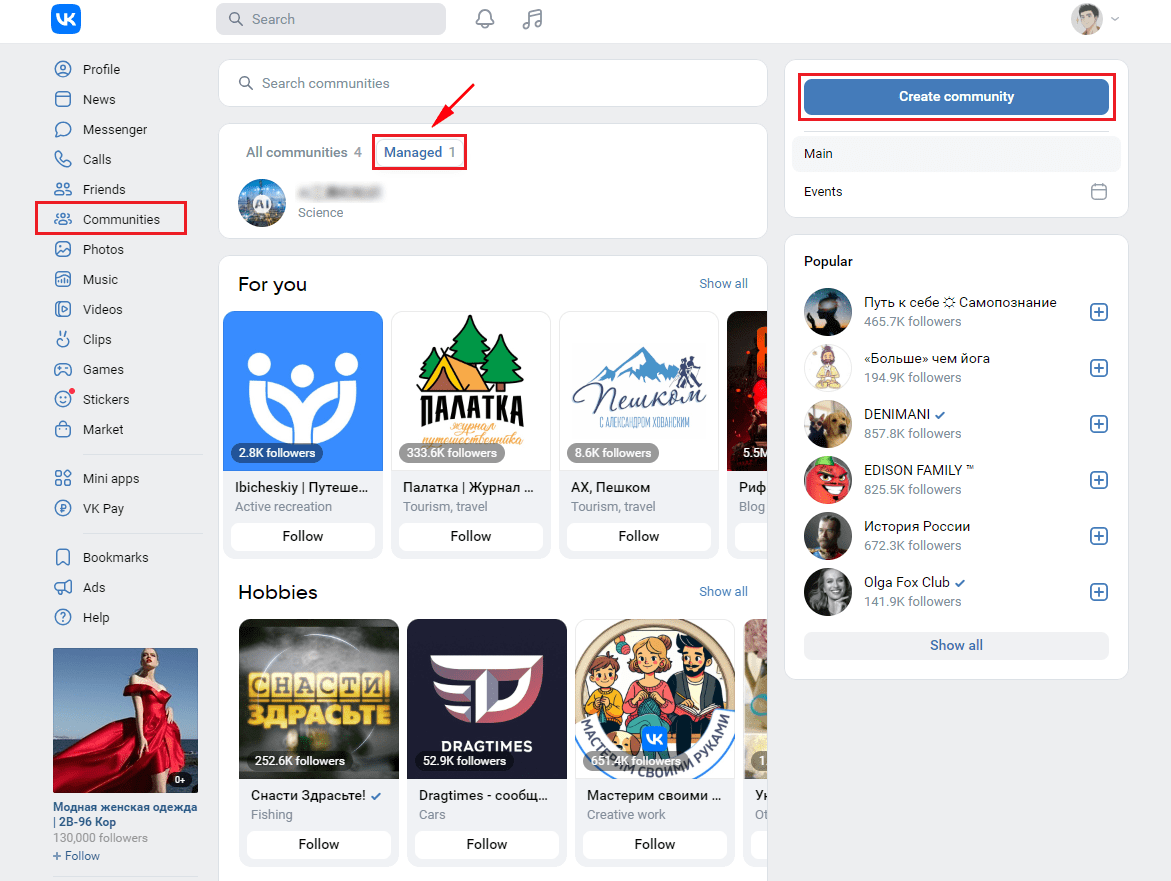
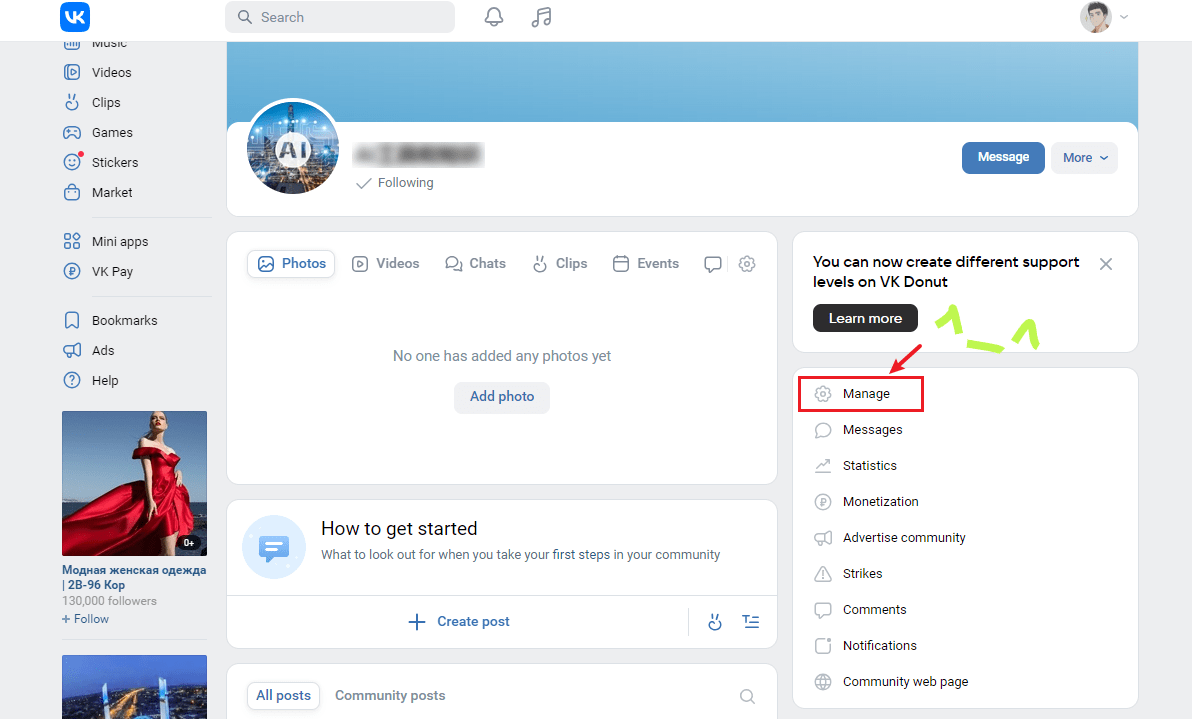
(1) Enter the VKontakte official website. Log in to your VKontakte account, click on the community on the left to enter the community list, select a community that you can manage to enter the community page (if you don't have a community, you can click on create community to enter the community page)
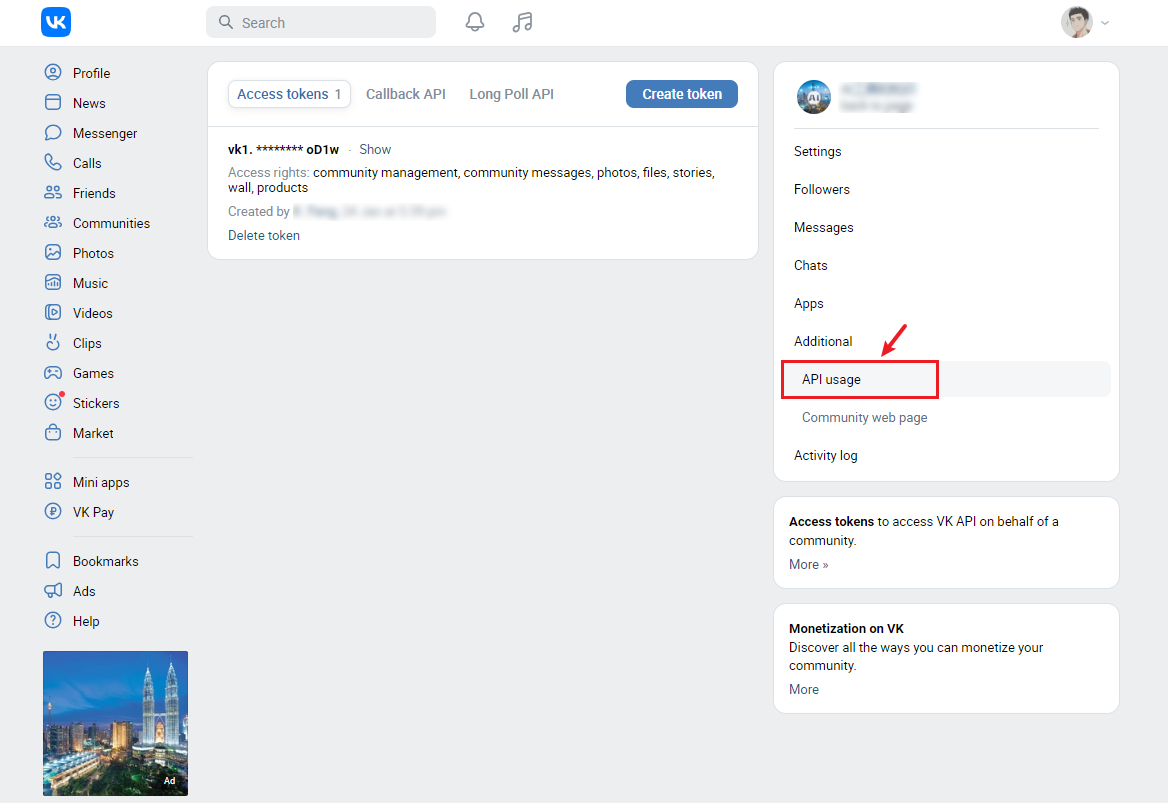
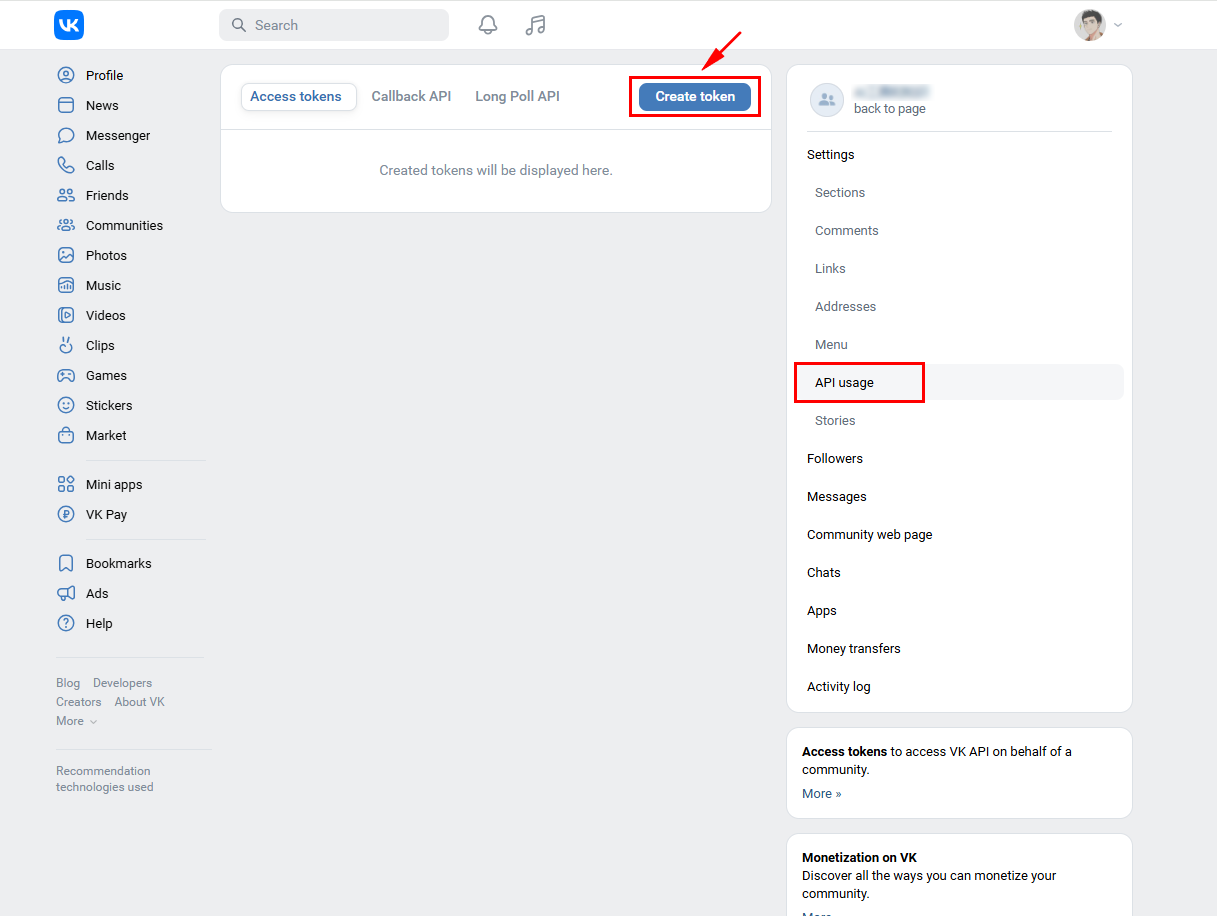
(2) Click on "Manage" on the community page to enter the settings page, and click on the "Additional" - "API usage" menu on the right side of the settings page to enter the API settings page.
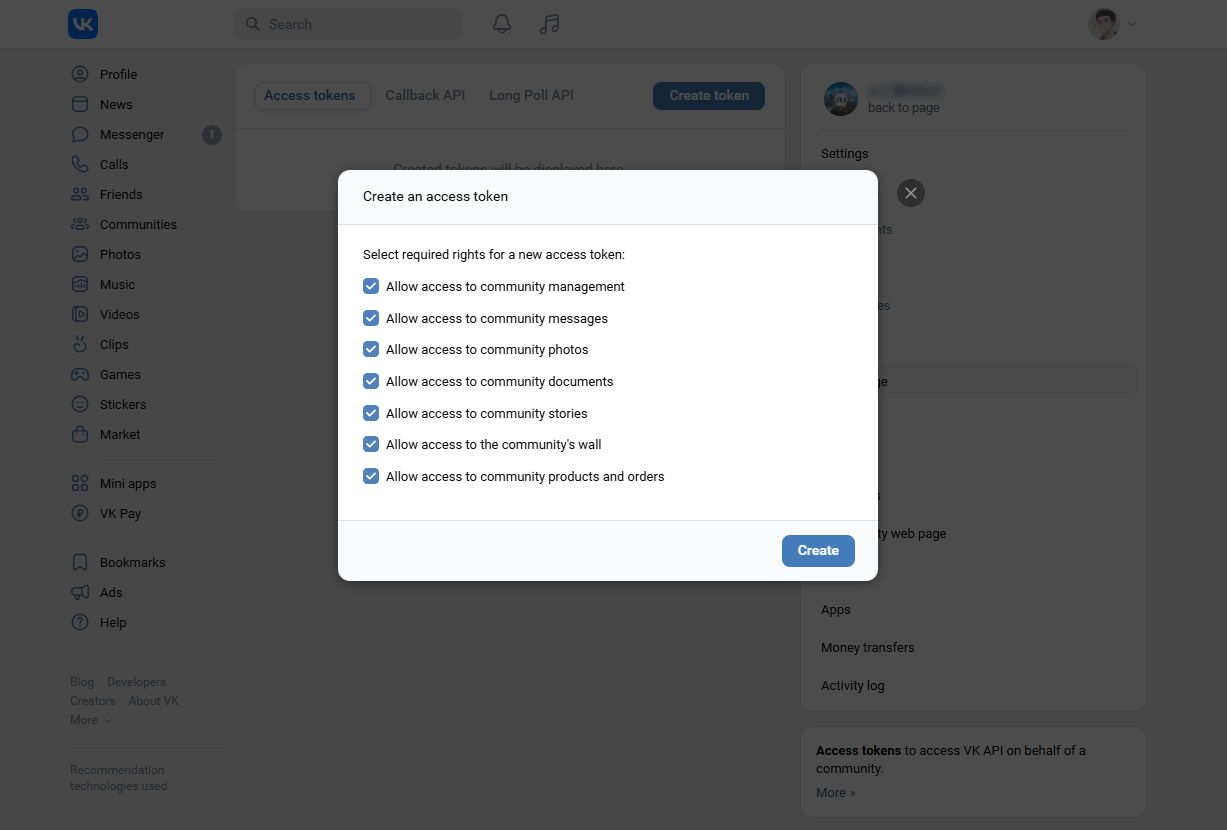
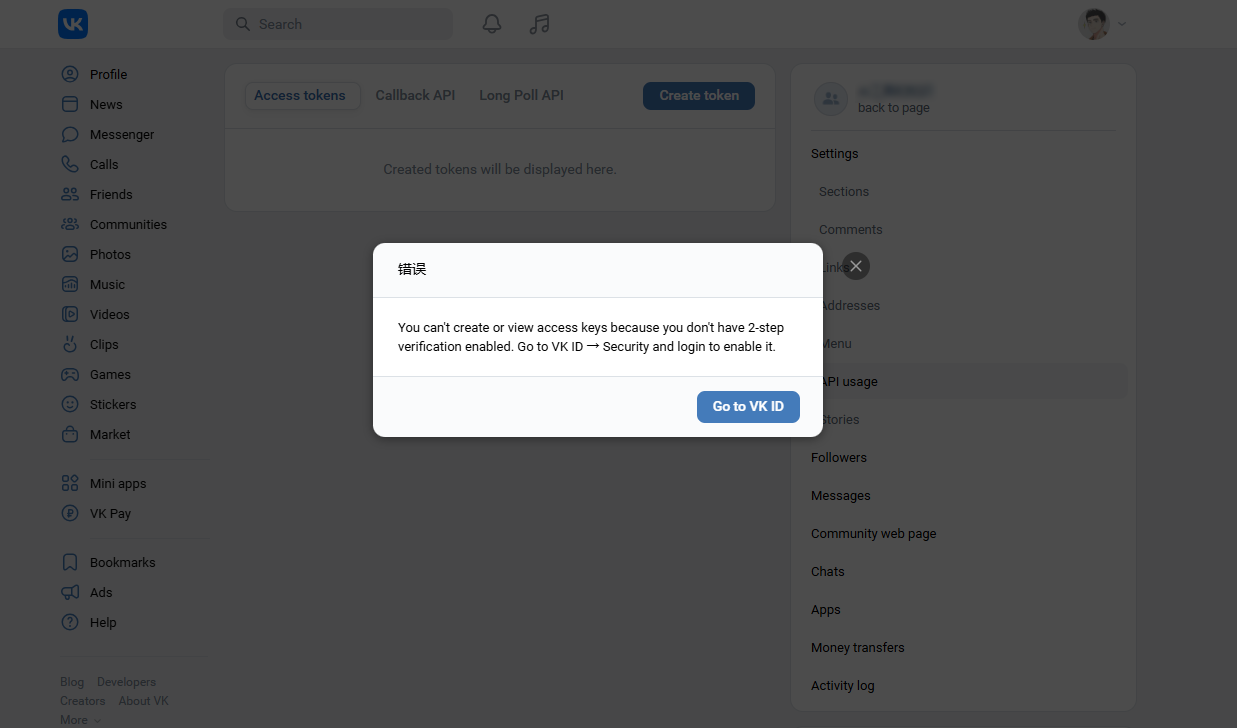
(3) Click on 'Create token' on the API settings page, and it is recommended to check all permissions when creating to avoid abnormal community messages caused by permission issues.
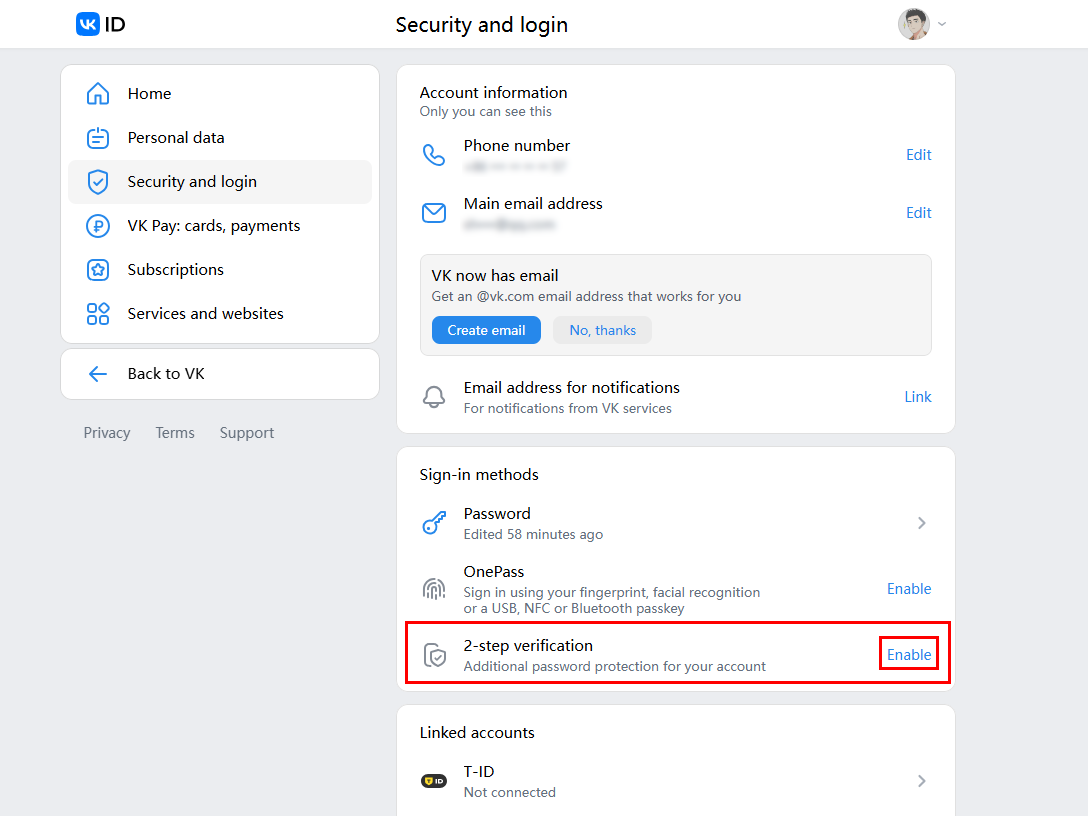
When creating an access key for the first time, it may prompt a creation failure and require clicking on "Go to VK ID" to enable two factor authentication.
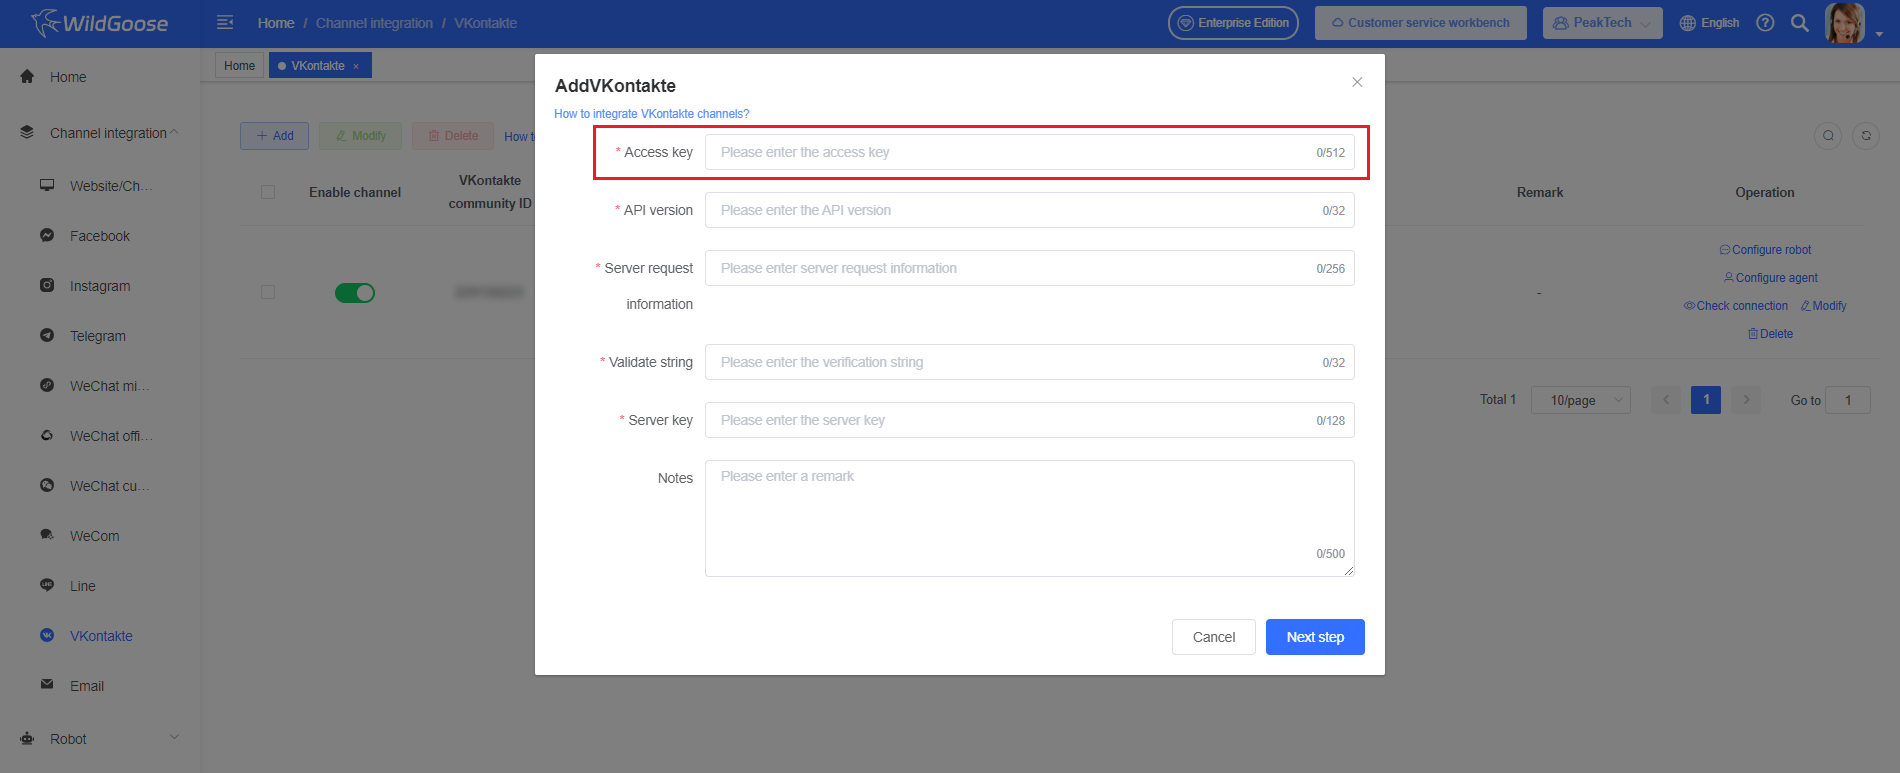
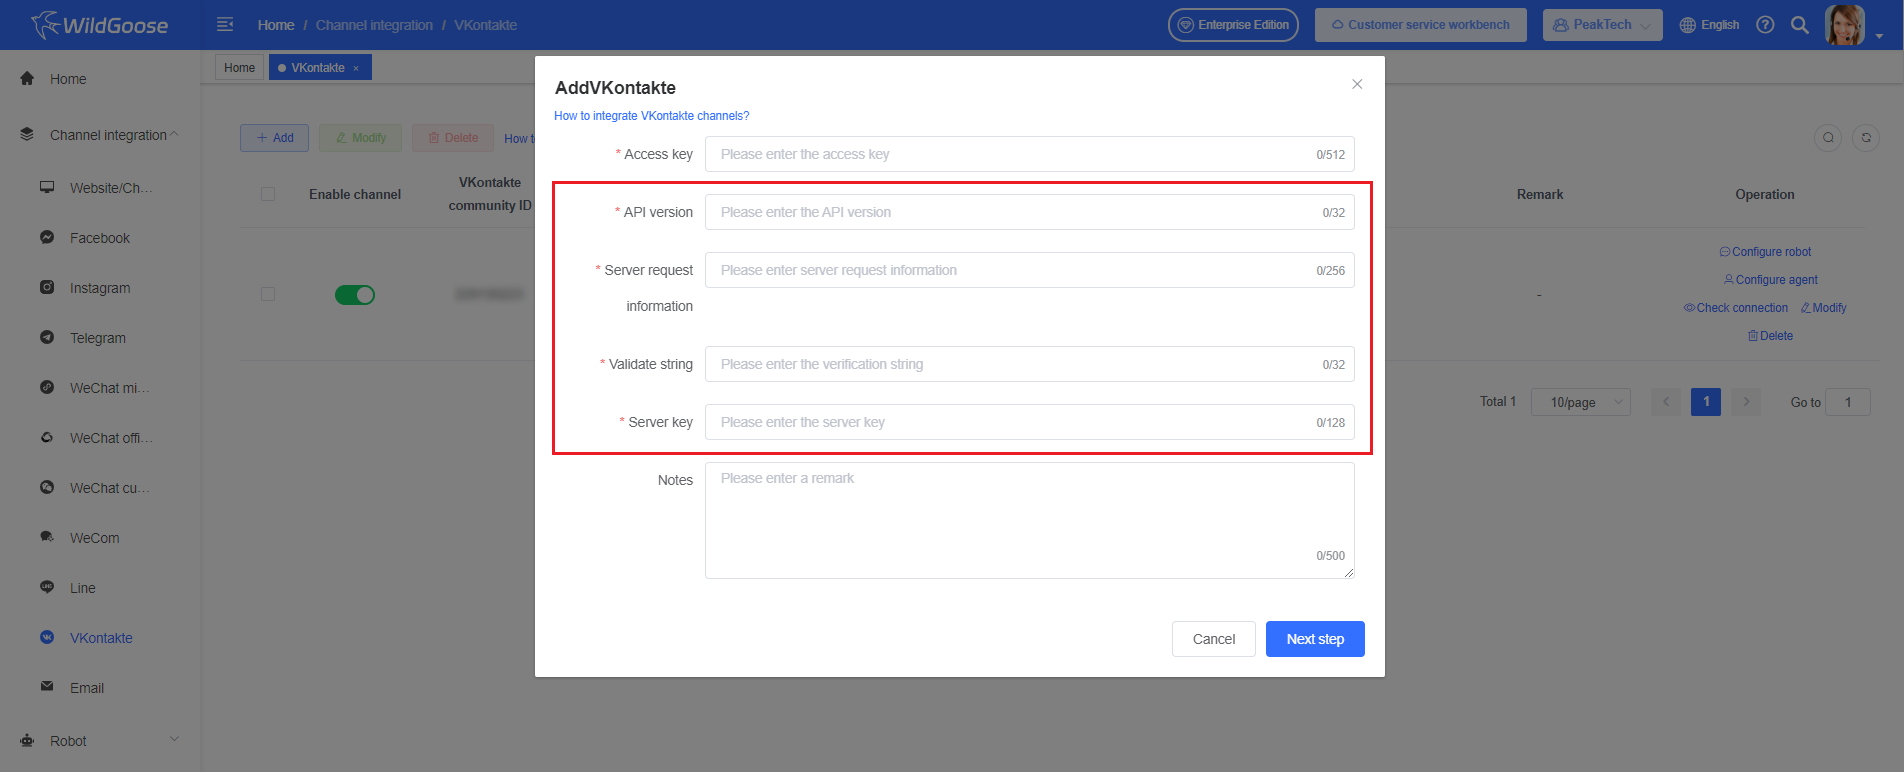
(4) After the key is successfully created, copy the key and fill it into WildGoose customer service.
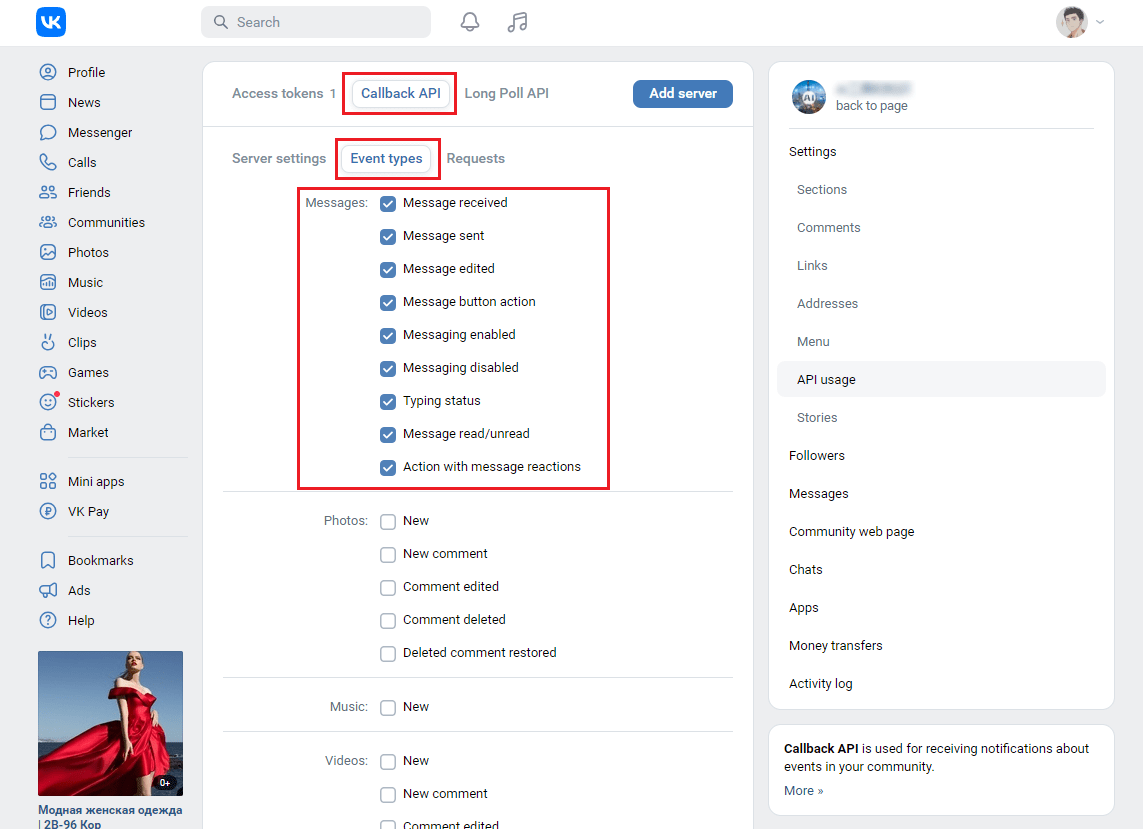
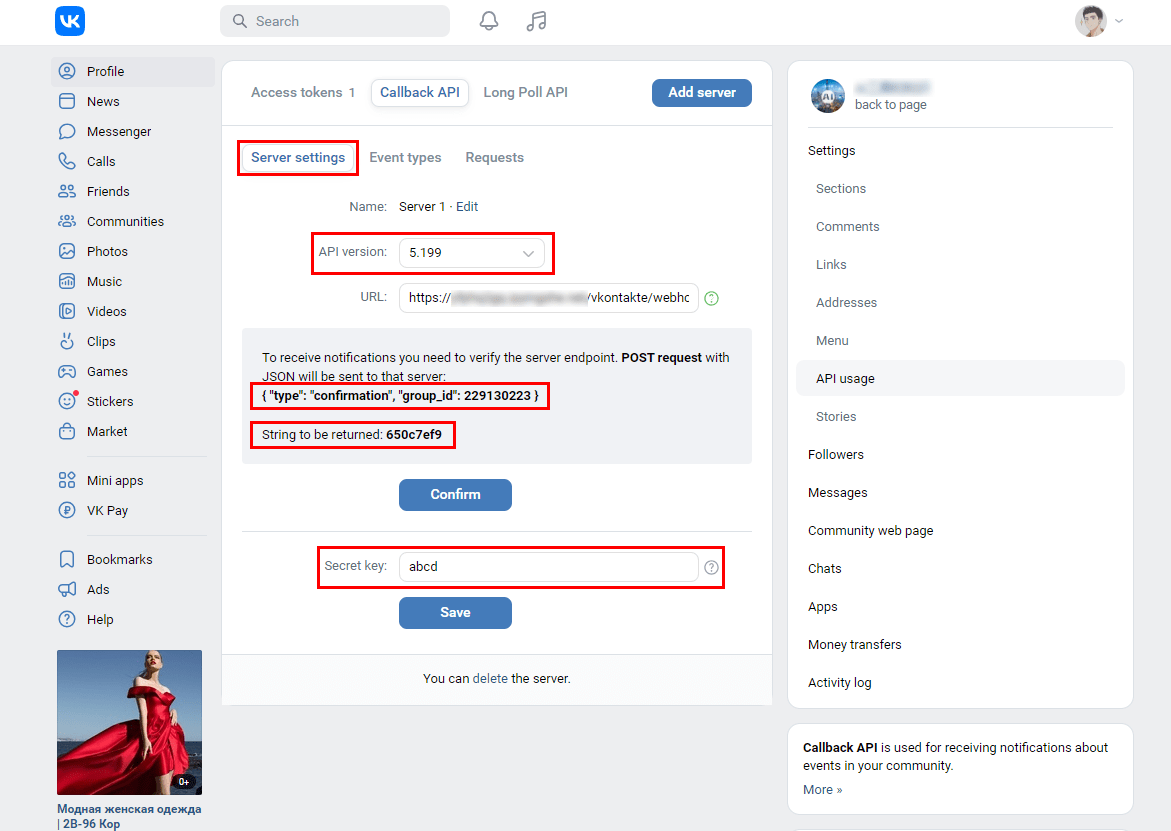
(5) Click on the "Callback API" in the community API settings page, select the activity type and check the message permission (please check all options, otherwise you will not be able to receive messages)
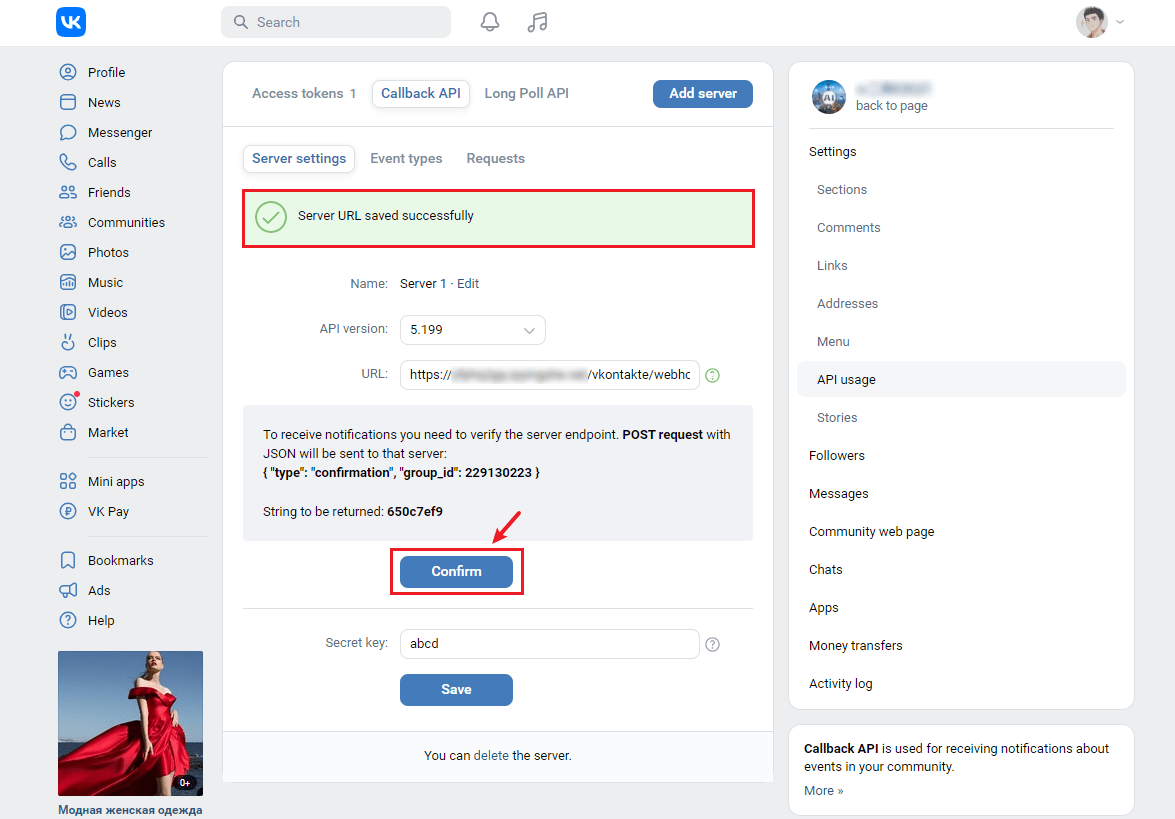
(6) Click on 'Server Settings' to set the key, copy the key information to WildGoose customer service, and click 'OK' to create the server URL address in WildGoose customer service.
(7) Fill in the server URL address generated by WildGoose customer service into the VKontakte server address. Click the confirm button in the WildGoose customer service dialog box, and create the VKontakte channel.
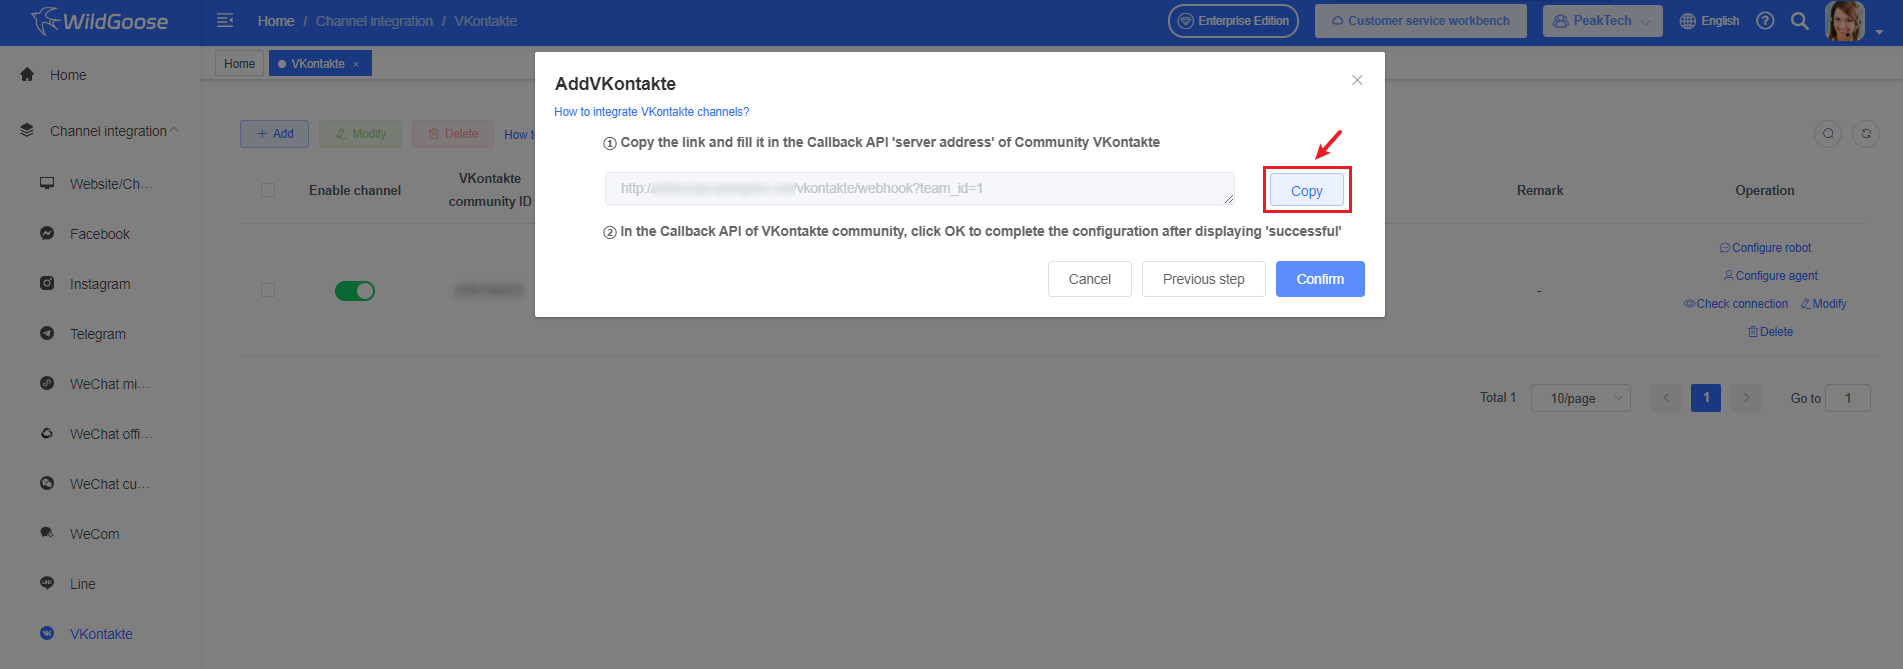
Click the confirm button in the dialog box of WildGoose customer service to create the VKontakte channel.
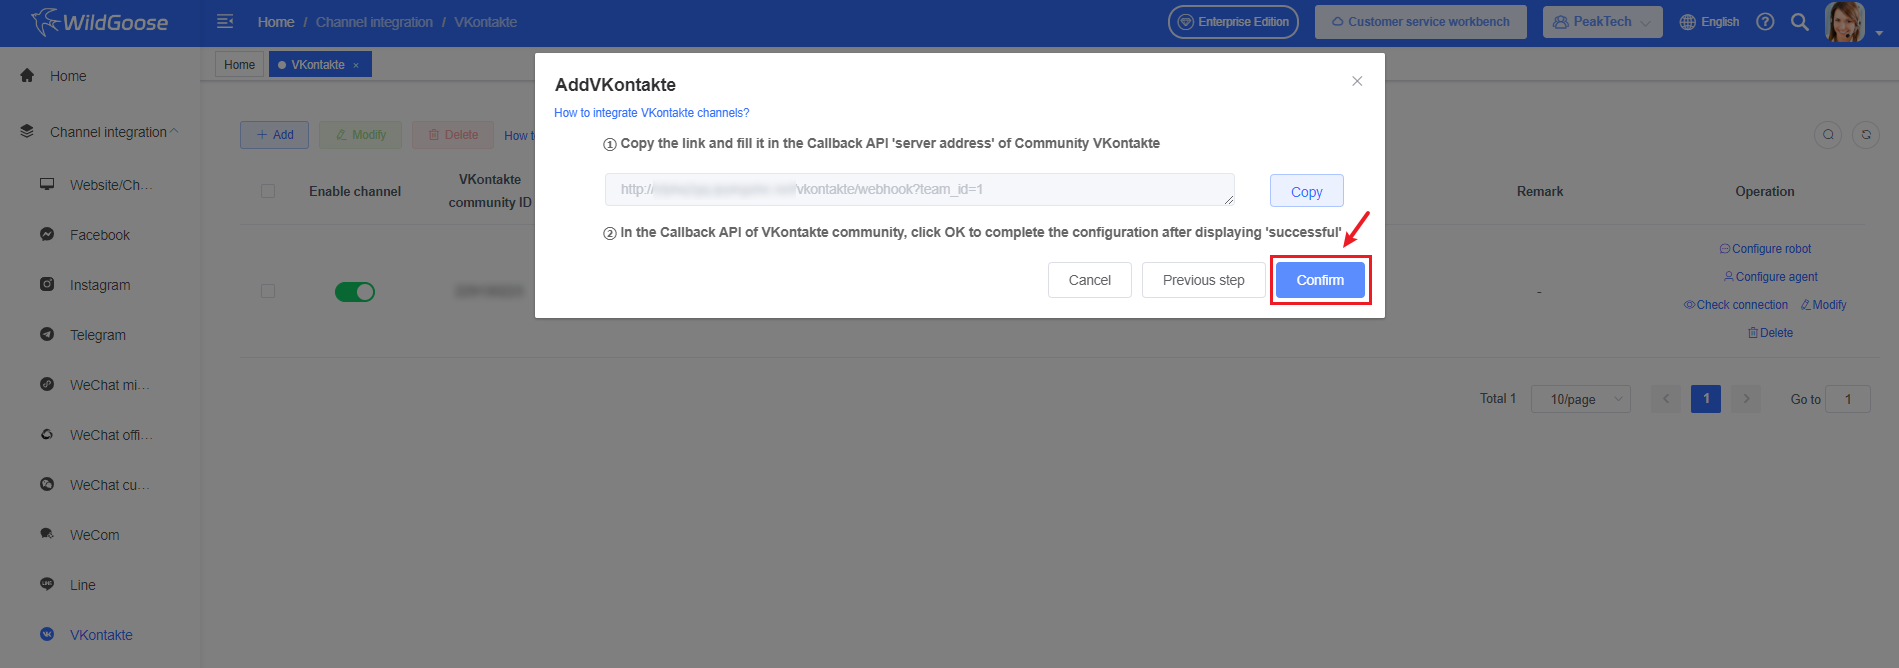
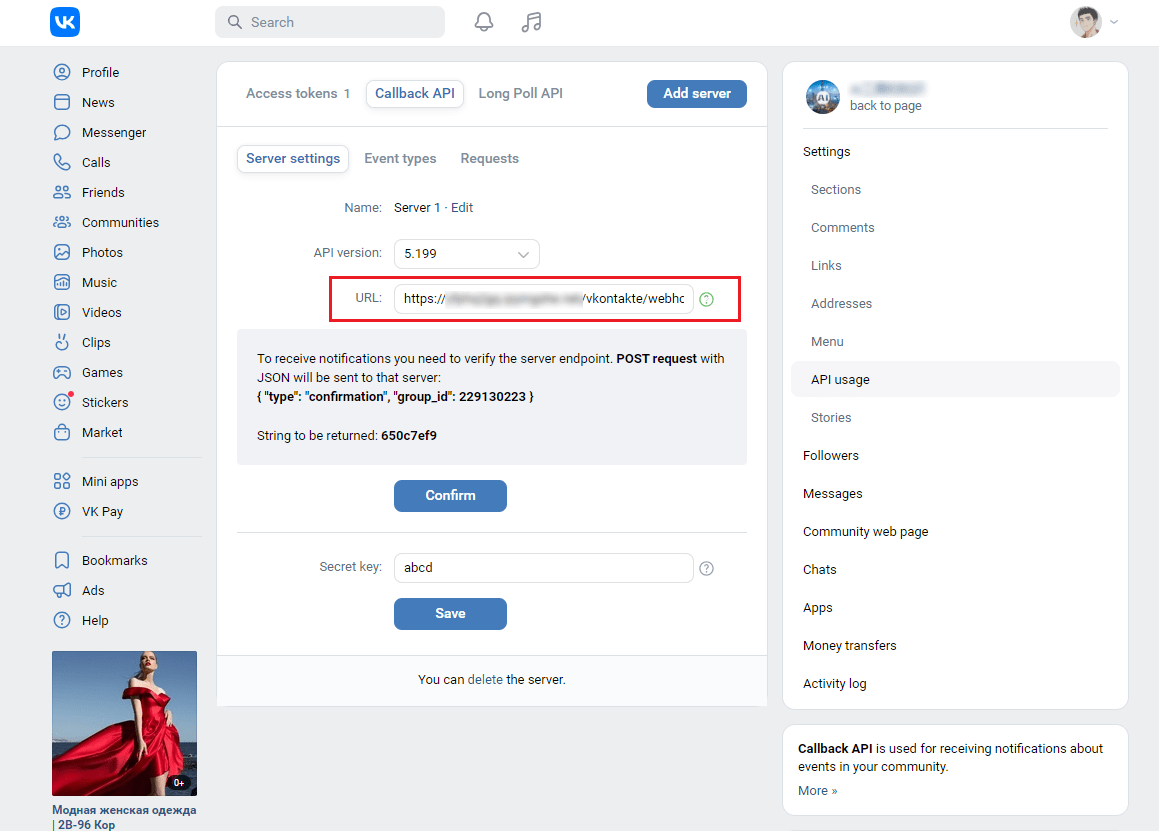
(8) After clicking 'Confirm' in the server address of VKontakte, if 'Server URL saved successfully' is displayed, it means that the configuration has been successfully completed.